
Blender Dummy
Whats What
Adding the Backstory DailySmall steps each day............
More at https://dailypostsblenderdummy.blogspot.com
Day 63 Unity package APK installed on android device.
https://www.youtube.com/watch?v=Hlct62rarjw
Day 55 Shades Smooth.
https://youtu.be/Lj64X1MZWco changed from default "Shades Flat"
Found in "Faces" menu.

DAY 51 looking at the textures and materials tutorials, found one by tutor4u, highly recommended by many, I have watched it once already. I will watch again, with more attention and try the steps myself, will post what I takeaway from attempt link here https://www.youtube.com/watch?v=fZSD7pVIUkY
Still to update the end model, all days so far just practice basics
DAY 50 looking at a fire effect
Adding background, basic animation
DAY49 where background is a still image, animation is in z-axis only walking into a still image that is drawn with perspective
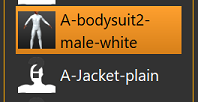
DAY48 next the waistcoat there are boots too Adding to the library Where I have been able to upgrade from thumbnails where you can't make out the MH asset because it is so small in the image in the menu. I left in the "A suit-bottom" from
DAY43 as an example of a wrong way it can be done. work in progress
I did not work at this every day, but have listed the days of progress made.......... Laugh and I hope you enjoy
DAY47 installing Rokoko to make progress on the animation side of my learning. my experience uploaded to youtube here. https://www.youtube.com/watch?v=C6dBA0nj2HI
DAY46 making a mask from an exiting MH folder. It is a Hack. Copy the folder of the exiting asset. rename it what you what it, not using a name that is already there.
Edit the files and replace the title of the folder to match the titles used in the files.
Reopen MH and the new asset exists there.
Edit the png which has the texture to make it different.
DAY45 face mask that disappears on edit.

DAY44 create thumbnail with paint as described in
https://www.wikihow.com/Make-Thumbnails#Using-MS-Paint-on-Windows
resize and skew in the MS-paint menu, switch off ratio, change to pixels 128x128
save as "nameoffile.thumb" where the quotes are important.
you have a thumbnail for MH
DAY43 suit creation test, MH export and create a thumbnail from the model MH and move it to the clothes directory. Lazy way rather than creating the thumbnail in thirdparty tool online.

where is the thumbnail in the folder.

when in blender

discovered shift-k when weight painting helps a lot.

and the tool I am using for creating a clothing library
DAY38 Added bones to model.
May have to start again and create a new topology that matches the bones. It seems to be where I went wrong. The yellow bones highlighted were original. The bones that extend out from there added later. That is where it all went to messy. The clip shows the left wing not moving as desired. It also creates artifacts in the chest.
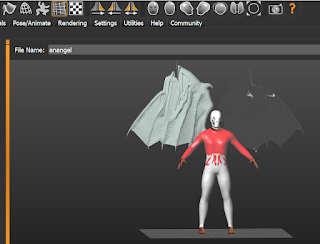
DAY37 Had an idea to create a cozplay model of a Hazbin Hotel character. The clothing layers are still not quite right, but here is the image of the on going work.

Day36..........
Day35..........
DAY12 .......
DAY11 Up to this point I had used a still image in the background added in blender. Or Live scenes, where there might be public in focus. Will test greenscreen OBS software solution at some point. Or create a cheap diorama theatre for display of models as a work around.
But this limits the movement when added into 3dViewer. The background also would move in relation to mouse movements in the scene. I found this distracting. GLB files have few choices to view them. Only the 3Dviewer does most of what I want unless I want to spend a lot of money on VR equipment or software.
DAY10 Recording the actions of what I am doing to increase my knowledge, and help just remember simple things like removing duplicate vertices. This is super important in animating models. if you don't want the faces to come apart. Joining meshes together and removing the duplicates with merge "by distance". And blender informing me of the vertices the mesh was reduced by. Hurrah I said to myself the day I solved this. Only discovered it by chance. When off to have a cup of tea as a celebration of discovering this without learning it on youtube. Because I have become hooked on youtube as a source of learning and first port of call after this point.
DAY9 I found that I was learning so fast that knowledge learned on a previous activities but not understood clearly. Did not work the next time I tried. Good example of this was UVmaps. Forgot how I did it exactly. I started writing notes as a result. Which helped me, when practiced by using my notes of earlier attempt. I am not the best note taker and my handwritten notes often made no sense. Describing the different places you have to do steps in the blender interface. Much easier when you know where. But I repeated till found the method. Then practice repeatedly, each time updating notes with postit over the top. Correcting the bad record of the earlier attempt.
DAY8 Keyframes, Selecting the model, losing the movement of the bones because not using (I)nsert in the timeline with all the bones of the Rig highlighted. Was an important lesson.
DAY7 Back to animation of model in Blender. It was getting lost in export from blender to the GLB format. I would keep coming back to this over next few days. But it would require many attempts and I will not say that I cracked it in a single day. I needed to make smaller steps of progress to see results. getting my head around one series of actions. That was going to be hard enough. I will publish how I did this - not here
DAY6 Learning of materials, which I confused with textures for the longest time. I was still unhappy with my artwork, and not to get disconcerted I chose a less ambitious target to draw. Something I could do in 3D. Used the same export to get it in GLB format so I could view it in 3Dviewer with windows.
That hurdle overcome. Many Youtube tutorials later. I have one model half way happy with below.
DAY5 I really wanted to create mesh models, add animations. Upload them as GLB files. I was not to close to doing this. My early attempts of modelling are pretty bad. But I share them, so I can give you a laugh and I can remember. A free hand model which I admit I was not trying to make beautiful but it was an early attempt and just practicing the use of the tools available.

But I created my own bones to move the eyes, but manually creating bones to move the mouth. Always the seemed to break the mesh. Creating artefact errors, textures were created very basically. There was a big gap of a week because I struggled with UVmaps. Not describing that here. I will post about that separately.
DAY4a went back to learn some basics. Did the tutorial from Blender Guru. Which you can find here.
https://www.youtube.com/watch?v=nIoXOplUvAw&t=0s
Create a donut, and I loved doing the flame on the Monkey Head which I will use as an effect if I create a video at some point. So easy when you have the know how.
DAY4 Gave up on that and when back to my GLB project. A flat image with a background as a learning experience. The youtube of a Hazbin Hotel character shown here, crude but a place to start.
DAY3 It had been a weekend, so at the computer from day2 overnight and still going. Got into edit mode and back to object mode. Why was it I was losing the changes in the mesh. Drove me to search the internet and video after video of tutorials. Got nowhere. Creating my own Box model and adding a rig would work. Keeping the changes. At a loss, finding my way out of the dark.
DAY2 Using GLB files as I did on the 2.79 but it did not work straight away, so when back to do a refresher. Used a fbx file that I downloaded from Sketchfab website. A free shared file I found that also had the blender file provided. Found the animation loop did not play. If you have ever used the import and of a model and the orientation of the import does not match the rig. The mesh faced the ground, the rig was straight up in the Z axis. Fiddling with the import settings, or changing the model to match messed up the movements of the model. Drove me insane, as the model imported from fbx file looked wonderful.
I admit that, I would find out later that this was just my lack of the smarts at the time. Like the title of the blog. It is the dummy at the keyboard.
DAY1 Install blender again on a rebuilt machine, check out the new interface, as I was familiar with much older version. Adding the options I could remember from the previous install. As I jumped from 2.79 to 2.93 - but I also have installed 3.0 to the desktop.
Why?
I want others to learn from my failures.
Where?
Created on your laptop with the blender and Unity studio exported to android or oculus devices.
How?
Create a model in blender, export as video frames converted using windows Video-Editor or 3Dviewer. And placed on realworld background with OBS studio or exported as APK to install on android devices.


No comments:
Post a Comment